
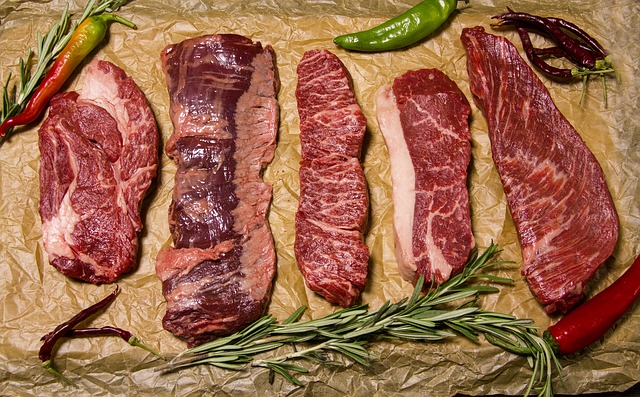
How to slice brisket? Simple Steps
Are you intimidated by the thought of slicing brisket? You are not alone. The process can seem a bit daunting, but it is really not as difficult as it seems. In fact, with the right tips and techniques, you can have perfectly sliced brisket every time. So, if you are ready to learn how to slice brisket like a pro, keep reading for our top tips.
Learning how to slice brisket is an important skill for any barbecue enthusiast. Not only does it add a touch of professionalism to your cookouts, but it also ensures that your guests will enjoy their meal. In this blog post, we will teach you the proper way to slice brisket so that you can create perfect portions every time. Keep reading for tips and tricks on mastering this essential barbecue technique.
If you are like me, when you think of barbecue, the first thing that comes to mind is Texas-style brisket. There is nothing quite like a smoky, tender piece of brisket. In this blog post, I’m going to teach you how to slice brisket like a pro.
Table of Contents
Preheat the oven to 275 degrees F
When you preheat the oven, set the temperature to 275 degrees Fahrenheit. This is the perfect temperature for baking cookies. The cookies will come out nice and crisp. If you want softer cookies, you can set the oven to 250 degrees Fahrenheit. The cookies will be softer, but they might not be as crisp. If you want chewy cookies, you can set the oven to 300 degrees Fahrenheit. The cookies will be chewy, but they might not be as soft. The best way to find out what works best for you is to experiment with different temperatures. Try different temperatures and see how the cookies turn out. Find the temperature that gives you the results that you want. There are a few things to keep in mind when baking cookies. First, make sure all of your ingredients are at room temperature before beginning to bake. Room temperature ingredients mix together more easily and produce a more consistent cookie dough. Secondly, use an ice cream scoop or spoon to portion out your dough onto the baking sheet- this will ensure that each cookie is uniform in size and will bake evenly. Finally, don’t forget to preheat your oven. This step is often overlooked but it is crucial for getting perfectly baked cookies. Now that you know the basics, go forth and bake some delicious cookies. Experiment with different recipes, flavors, and textures to find what you like best.
To get the most out of your oven, make sure that it is preheated to 275 degrees Fahrenheit before you start cooking. It will take about 10 minutes for an average sized dish but check individual recipes as some may need more time or less depending on their size and shape. Once it is preheated, bake your dish in the oven for the recommended amount of time. Remember to keep an eye on it so that it doesn’t overcook. When your dish is finished cooking, let it cool down for a few minutes so you can enjoy it at its best. Heating the oven to 275 degrees F will ensure that your meal cooks evenly and doesn’t overheat any part of it. The key to getting the most from your oven is preheating it before you start cooking. It will take about 10 minutes for an average sized dish but check individual recipes as some may need more time or less depending on their size and shape; once this step has been completed, make sure not leave food uneaten in order that they can finish cooking properly. When finished with baking times recommended by authors (and remembering to always keep a close eye.), let cool slightly while enjoying at peak flavor. One could also try experimenting with fun toppings or ingredients on their finished dish- whether that is an extra sprinkle of cheese, a dollop of sour cream, or even a delicious sauce to top it all off. With these tips in mind, oven cooking can be a breeze and something that the whole family will love.
If you are looking to brown your food more, then you can increase the oven temperature to 350 degrees F. This will help to give your food a nice golden color while still cooking it evenly. Just be careful not to overcook your food at this higher temperature, or it may become dry or burnt. If you want to give your food a nice golden color and still cook it evenly, then increase the oven temperature until 350 degrees F. Just be careful not to overcook so as not to burn or dry out any of those delicious meals. If you are looking for a way to add some extra flavor to your food, then grilling is a great option. You can either use an indoor grill or an outdoor one, but make sure that the temperature is set to about 350 degrees Fahrenheit so that your food doesn’t get burnt. Just be careful not to overcook so as not burn or dry out any of those delicious meals.
Depending on what you are cooking, you may also need to adjust the cooking time. For example, if you are baking a cake, it will usually take around 25-30 minutes to cook fully at 350 degrees F. If you are roasting a chicken, on the other hand, it might take an hour or more to cook through at 275 degrees F. So be sure to read the recipe thoroughly and plan accordingly. The cooking time will depend on what you are making. For example, if baking a cake it usually takes around 25-30 minutes at 350 degrees Fahrenheit (176 Celsius). However the oven temperature may be different for each product depending upon its size and complexity which means that timers are essential when preparing food items in order not to over or under cook them.
Trim any excess fat off the brisket and then cut it into two even halves
This recipe for slow cooker beef brisket is simple and delicious. The beef brisket is first seared in a hot skillet, and then cooked low and slow in a flavorful broth. The result is tender, juicy, and flavorful beef that can be served with your choice of sides. So if you are looking for an easy recipe to make for dinner, give this one a try.
How to slice brisket? To get the most out of your oven, make sure that it is preheated to 275 degrees Fahrenheit before you start cooking. It will take about 10 minutes for an average sized dish but check individual recipes as some may need more time or less depending on their size and shape.
If you are using an electric oven, preheat it to 275 degrees Fahrenheit. If you are using a gas oven, preheat it to 350 degrees Fahrenheit. Put the dish in the oven and set the timer according to your recipe. Once the timer goes off, check your food to see if it is done. If not, put it back in for a few minutes until it is cooked through. Now that you know how to properly preheat your oven, you can start cooking up some delicious dishes. Just remember to always check your recipe so that your food comes out perfect every time.
When cooking in an oven, it is important to always preheat your appliance. This way you can avoid under-cooked or overcooked food. In this article we will show how properly heating up the kitchen device will help prevent any disasters when making dinner tonight – just follow these simple steps: If using electric power source (like most modern day kitchens), set temperature at 275 degrees Fahrenheit before starting timer. For gas appliances go ahead and raise heat setting closer towards 350 degree level if available since they tend run hotter than other types Hydrate yourself with some well deserved rest while reading through process again until done.
Next, take out anything that was in the oven previously so there’s more room for your meal. Now it should be preheated and ready to go. Place food inside on the middle rack, making sure not to touch any walls or each other if multiple items are being cooked at once. Start timer as soon as possible after putting everything in so timing will be more accurate. Bake until done according to recipe instructions – this could be anywhere from 10 minutes an hour. Once finished, remove items carefully using oven mitts or pot holders. Let them cool down a bit before serving hot foods, or else placing them on cooling racks if necessary.
If you are looking for perfectly cooked food, it is important to preheat your oven. This way you can avoid under-cooked or overcooked food. In this article we will show how properly heating up the kitchen appliance will help prevent any disasters when making dinner tonight – just follow these simple steps: If using electric power source (like most modern day kitchens), set temperature at 275 degrees Fahrenheit before starting timer; For gas appliances go ahead and raise heat setting closer towards 350 degree level if available since they tend run hotter than other types. Hydrate yourself with some well deserved rest while reading through the process again until done. Next, take out anything that was in the oven previously so there is more room for your meal. Now it should be preheated and ready to go.
Place food inside on the middle rack, making sure not to touch any walls or each other if multiple items are being cooked at once. Start timer as soon as possible after putting everything in so timing will be more accurate. Bake until done according to recipe instructions-this could be anywhere from 10 minutes an hour. Once finished, remove items carefully using oven mitts or pot holders. Let them cool down a bit before serving hot foods, or else placing them on cooling racks if necessary.
How to slice brisket? When it comes time to actually bake the food, make sure that it is placed on a baking sheet in order to prevent sticking and ensure even cooking. This will also help with cleanup afterwards. If there are any specific directions from the recipe being followed, be sure to adhere to them so that the meal turns out perfectly. After the food has been cooking for the directed amount of time, use a toothpick or other sharp utensil to test done. Once it comes out clean, it is ready to be removed and served. Letting it sit for a few extra minutes will not hurt anything, but overcooking is something you want to avoid. And there you have it – following these simple tips will result in delicious oven baked food every time.
Liberally season each half with salt, pepper, and your favorite BBQ rub
Season the chicken with salt, pepper and your favorite BBQ rub. If you don’t have a specific spice combination that works for you then simply mix together equal parts paprika or chili powder alongside garlic & onion powders before placing on the indirect heat side of grill- skin side up until meat reaches internal temperature 165° F. This way we can get a nice exterior crunchy texture while keeping the inside well seasoned. Once chicken has had time to cook through, brush on your favorite BBQ sauce and allow it to caramelize on the grill for a minute or two- it will be delicious. Serve with sides of your choice, we love our Texan style with grilled corn & black beans.
Next, you will want to liberally season each half of the chicken with salt, pepper, and your favorite BBQ rub. If you don’t have a specific rub that you like, simply mixing together equal parts paprika, chili powder, garlic powder, and onion powder is a great way to create your own signature blend. Once the chicken is seasoned, place it on the indirect heat side of the grill with the skin side up. You will want to cook the chicken until it reaches an internal temperature of 165 degrees Fahrenheit. Baking cookies is a pretty straightforward process. You just need to find out what temperature works best for you and your desired outcome. For example, if softness are more important than crispiness then setting the oven at 250 degrees Fahrenheit will yield excellent results; however those who like their treats chewy may prefer 300°F instead because it brings out both qualities in equal measure- so there is no wrong answer here as long as everyone has fun trying new things and finding what works for them. One other thing to keep in mind is that there are endless possibilities when it comes to cookie recipes. Be sure to experiment with different flavors, textures, and combinations to find the perfect ones for you and your loved ones.
The key to getting the most from your oven is preheating it before you start cooking. It will take about 10 minutes for an average sized dish but check individual recipes as some may need more time or less depending on their size and shape; once this step has been completed, make sure not leave food uneaten in order that they can finish cooking properly. When finished with baking times recommended by authors (and remembering to always keep a close eye.), let cool slightly while enjoying at peak flavor. One more thing: make sure to remove whatever you are cooking from the oven promptly. Unless you are using a convection oven, food left in there for too long will continue to cook and may become tough or dry. As with most things in life, practice makes perfect so don’t be discouraged if your food doesn’t turn out perfectly the first time- keep trying and you will get it right every time.
Assuming you are using a charcoal grill, you will want to add fresh coals to the fire every 30 minutes or so to maintain a consistent temperature. When the chicken is cooked through, remove it from the grill and allow it to rest for 5-10 minutes before serving.Charcoal grills require more frequent replenishment of coals than gas ones, so it is important to check the temperature often and add wood or other fuels when necessary. Use a brush (or shovel) for added convenience. The best way is 30 minutes before desired finish time; remember – less heat leads to longer cooking times. When cooking with charcoal, it is important to add wood or other fuels frequently so as not let the fire die out.
Another key safety tip is to never use gasoline or any other flammable liquids to start or help maintain a charcoal fire – always opt for an electric starter, lighter fluid, or other safe option. Also, be sure that the grill is completely extinguished and cooled before attempting to move it. Finally, keep a watchful eye on children and pets who may be attracted to the bright flames and/or smells associated with grilling.Grilling is a fun and popular way to cook, but it is important to keep safety in mind at all times. By following the tips above, you can help ensure that everyone enjoys a safe and delicious meal.
How to slice brisket? If you are using a gas grill, you will want to adjust the settings so that one side of the grill is set to high heat and the other is set to low heat. Place the chicken on the low heat side of the grill with the skin side up and cook for about 45 minutes, or until it reaches an internal temperature of 165 degrees Fahrenheit. Remember- if you are using a gas grill, you will want to adjust the settings so that one side of the grill is set to high heat and the other is set to low heat. This will help ensure that your chicken cooks evenly. When the chicken is cooked through, remove it from the grill and allow it to rest for 5-10 minutes before serving.
Place the brisket halves in a large baking dish or Dutch oven
Place the brisket halves in a large baking dish or Dutch oven, making sure they are not lying flat against one another. Add water to just below six inch level (or as needed) and cover with aluminum foil tenting tightly over top of meat so no liquid seeps through bottom vent before placing inside heated oven- this will help keep it moist during cooking time.
After the allotted time has passed, gently remove your meats from the smoker/oven and inspect; they should now be beautifully bronzed with a touch of pink still remaining near the bone. Carve away at your leisure and enjoy. Your smoked brisket is now ready to carve and enjoy. Make sure to let it rest for a few minutes before digging in – this will ensure maximum juiciness and flavor. Go ahead and serve up some delicious slices alongside your favorite sides- we recommend something like crispy roasted potatoes or creamy coleslaw.
If you are using a baking dish, make sure it is large enough that the brisket halves can fit comfortably in a single layer. If you are using a Dutch oven, make sure the brisket halves fit snugly in the pot. Pour about 1/2 cup of apple cider or beer over the top of each brisket half. This will help keep them moist as they cook. Then, sprinkle generously with salt and pepper. Place in a preheated oven, 350 degrees F, and bake for 3-4 hours, or until the meat is very tender. Remove from the oven and let rest for 10-15 minutes before slicing and serving.
Now you are going to put the brisket halves in a large baking dish or Dutch oven. Make sure that it is wide enough so there’s plenty of room for both pieces, and also tall because these things can get pretty big- putting them side by Side works best when they are similar sizes – place your chosen vessel over medium heat on stove-top burner; watch carefully as liquids boil away before adding more if necessary. Now, generously season your brisket halves with salt, pepper and garlic powder on all sides. If you are feeling saucy, you can also brush on a little bit of BBQ sauce at this point. Pour in about 1/2 cup of water or beef broth to the dish. You will want to cover the meat as much as possible with liquid so it doesn’t dry out while cooking- if you don’t have enough liquid, add more until the meat is well covered.
Cover the dish tightly with aluminum foil or a tight fitting lid and transfer to a preheated oven. Bake at 275 degrees for 3-4 hours, or until very tender. When done, remove from the oven and allow to rest for 10-15 minutes before slicing. To slice, use a sharp knife to cut against the grain into thin slices. Serve with your favorite BBQ sauce on the side. This dish is best served immediately after it is cooked. Leftovers can be stored in an airtight container in the fridge for up to 3 days. Reheat in a 350 degree oven until warmed through. If you are looking for a delicious and hearty dish to feed a crowd, look no further than this slow cooker BBQ beef brisket. Tender and juicy, with a delicious smoky flavor, this is sure to be a hit at your next gathering. Best of all, it is easy to make – just pop everything in the slow cooker and let it do its thing. Serve with your favorite BBQ sauce on the side for the perfect finishing touch.
How to slice brisket? To make sure that your brisket cooks evenly, place one half of the meat in a large baking dish and cover with aluminum foil. This will allow for even cooking without any unnecessary drying out or burning. Another important key to a delicious brisket is to make sure that it is cooked low and slow. Set your oven to 225 degrees Fahrenheit and allow the brisket to cook for anywhere from eight to 12 hours. This will ensure that the meat is fall-off-the-bone tender. Finally, once the brisket is cooked, be sure to let it rest for at least 15 minutes so that the juices can redistribute. And there you have it – the perfect brisket recipe.
Pour beef broth or stock over the meat until it is about halfway up the sides
The broth will help to cook the meat more quickly as it soaks in. To make sure that your meal is cooked through perfectly, don’t forget about adding some salt and pepper before putting on top of heat again – just be careful not to burn yourself handling hot pans or pots. Roasting a whole chicken is an art form. It may seem like there are many different aspects to consider when preparing food but often the most important thing that gets overlooked during the cooking process has less to do with what you are doing at home than where your ingredients came from-and this includes both taste and quality as well. That being said, if done right, dices will be tender enough without risk of drying out too much even after sitting awhile before serving which makes them perfect for dishes such as this one.
Roasting a whole chicken is an art form. It may seem like there are many different aspects to consider when preparing food but often the most important thing that gets overlooked during the cooking process has less to do with what you are doing at home than where your ingredients came from–and this includes both taste and as well. That being said, if done right, dices will be tender enough without risk of drying out too much even after sitting awhile before serving which makes them perfect for dishes such as this one. One of the best things about cooking a whole chicken is that you can use the leftovers for other meals. I like to shred the meat and add it to salads or use it in chicken soup. If you have extra broth, you can freeze it and use it later. Cooked chicken also freezes well, so if you have leftovers you can save them for another meal.
If you have time, let the roast sit in the fridge overnight, covered in the broth. This will add even more flavor to the meat. If you are short on time, don’t worry about it – just pop it in the oven and it will be delicious nonetheless. Preheat your oven to 375 degrees Fahrenheit before putting the roast in. Most roasts will take between 2 and 3 hours to cook, so plan ahead. When it is finished cooking, allow the roast to rest for at least 15 minutes before slicing into thin pieces. Serve with your favorite sides – we love mashed potatoes and green beans. When the roast has finished cooking, allow it to rest for at least 15 minutes before slicing into thin pieces.This will ensure that your meat is juicy and tenderized with a great flavor. Serve alongside mashed potatoes or green beans if you are looking for some sides that are perfect paired together. One of the best things about roast beef is that it is so versatile. You can serve it with a variety of sides, depending on your mood or what you have on hand. Mashed potatoes and green beans are always a classic pairing, but roasted veggies or a simple salad would also be delicious. No matter what you choose to serve with your roast beef, it is sure to be a hit.
In a large saucepan over high heat, bring beef broth or stock to a boil. Once it is boiled, partially fill the pan with Logan meatloaf and pour any excess liquid left in the pot onto his body while cooking on the stove-top accordingly so that he can be completely covered by soup later when done preparing this dish. Logan meatloaf is done when a toothpick or knife inserted into the center comes out clean. Let cool for at least 10 minutes before slicing and serving with your favorite sides. Additionally, you can garnish with fresh parsley or thyme before serving.
Place the brisket halves in a large baking dish or Dutch oven, making sure they are not lying flat against one another. Add water to just below six inch level (or as needed) and cover with aluminum foil tenting tightly over top of meat so no liquid seeps through bottom vent before placing inside heated oven-this will help keep it moist during cooking time. Place your newly smoked meats on any surface that is free from clutter like counter-tops near an open window area if possible; this way you can take advantage of the added smoke flavor that will permeate the air.
How to slice brisket? Now, close the door to your oven and set the temperature to 225 degrees F (or as close as possible). Smoke will begin to fill the kitchen-enjoy. Allow the brisket to cook for 6-8 hours or until a fork can be easily inserted and removed from the thickest part of meat. Once it is finished, remove from the oven and allow it to rest for at least 20 minutes before slicing; during this time, the juices will redistribute throughout the meat making it extra tender and moist. Serve with your favorite sides like macaroni and cheese, mashed potatoes, or green beans for a complete meal.
Cover the dish with aluminum foil and bake for 3-4 hours, or until the meat is very tender
Braising can be done in a variety of ways, but the basic principle is the same: The food is cooked slowly in a liquid, resulting in tender, flavorful dishes. There are two methods of braising: wet and dry. Wet braising involves adding liquid to the pan during cooking, while dry braising uses only the natural juices of the food itself.
Wet braising is the most common method and results in moisture, more tender dishes. Dry braising produces deeper flavor and is often used for tougher cuts of meat. Either method, it is important to brown the food before adding any liquid; this helps to create a flavorful fond, or base, for the braising liquid. Once the food is browned, the braising liquid is added. This can be anything from water or broth to wine or beer. The liquid should just barely cover the food; if there’s too much, it will boil off and not properly braise the food. The pan is then covered and placed in a slow oven; this allows the heat to evenly distribute and cook the food slowly without drying it out.
Braising is an ideal cooking method for tough, inexpensive cuts of meat such as chuck roast or pork shoulder. The long cooking time breaks down the tough fibers in the meat, resulting in tender, succulent dishes. Braising is a slow cooking method that uses both wet and dry heat. The food is first browned in fat, then cooked in a covered pot with a small amount of liquid. The liquid can be water, broth, wine, or beer. The key to successful braising is to cook the food slowly over low heat. This allows the tough fibers in the meat to break down without making the meat dry or tough. it is also a great way to add flavor to your dish by using different liquids like water, broth, wine, or beer. When cooking with braising, it is important to use low heat so the tough fibers in the meat have a chance to break down and become tender. Otherwise, you will end up with a dry and tough final product.
How to slice brisket? Braising is a great way to cook tougher, cheaper cuts of meat while also adding flavor to your dish. The key to successful braising is to cook the food slowly over low heat so that the tough fibers in the meat have a chance to break down without making the meat dry or tough. Try using different liquids like water, broth, wine, or beer to add even more flavor to your dish. With a little practice, you will be able to master this technique and impress your friends and family with your delicious, tender meals.
>>> See more: Texas Style Brisket Recipe
Conclusion – How to slice brisket?
Brisket is a delicious cut of meat that can be smoked, roasted or grilled. If you are looking to make brisket at home, follow these steps for the perfect slice every time. First, choose your brisket. The best briskets are those that have been trimmed well and have a nice layer of fat on top. Second, season your meat with salt and pepper. Third, smoke or roast your meat at a low temperature until it is cooked through. Finally, remove the brisket from the heat and let it rest for 10-15 minutes before slicing.
How to slice brisket? When it comes to slicing brisket, there are a couple of different ways you can go about it. The most popular way is the Texas crutch, which uses butcher’s twine to hold the meat together as it cooks. This gives the brisket a more uniform shape and makes it easier to slice. If you are looking for a little bit more flavor, you can also try smoking the brisket for a few hours before slicing it. Whatever method you choose, make sure to let your brisket rest for at least 10 minutes before slicing so that the juices redistribute evenly throughout the meat. And finally, don’t forget to use a sharp knife. A dull blade will just cause frustration (and potentially some dangerous accidents).
Read more:


